3D Printed Club Cleaner Mount for Push Cart
The Problem
Keeping clubs clean mid-round makes a real difference – dirt and grass packed into the grooves kills spin and control. Motorized golf carts have had side-mounted ball and club cleaners for years, and Scrubi has a solid solution for push carts too. Catch is, their mount is designed specifically for clip-gear-style carts, and my CaddyLite push cart doesn’t have that interface.
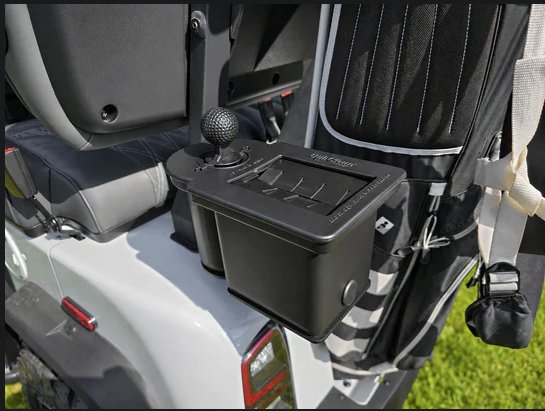
The style of integrated club cleaner common on motorized golf carts – the inspiration for this build.
Rather than live without one or switch carts, I modeled a custom two-piece bracket to mount a Scrubi cleaner to my cart’s frame tube.
Design
The bracket is split into two pieces intentionally. The lower piece slides around the cart’s frame tube, and the upper piece holds the Scrubi cleaner at an angle. Printing them separately lets me dial in the angle on assembly before gluing, which turned out to be important since the cleaner needs to be positioned where it clears the wheel and sits at a usable angle without sticking out awkwardly.
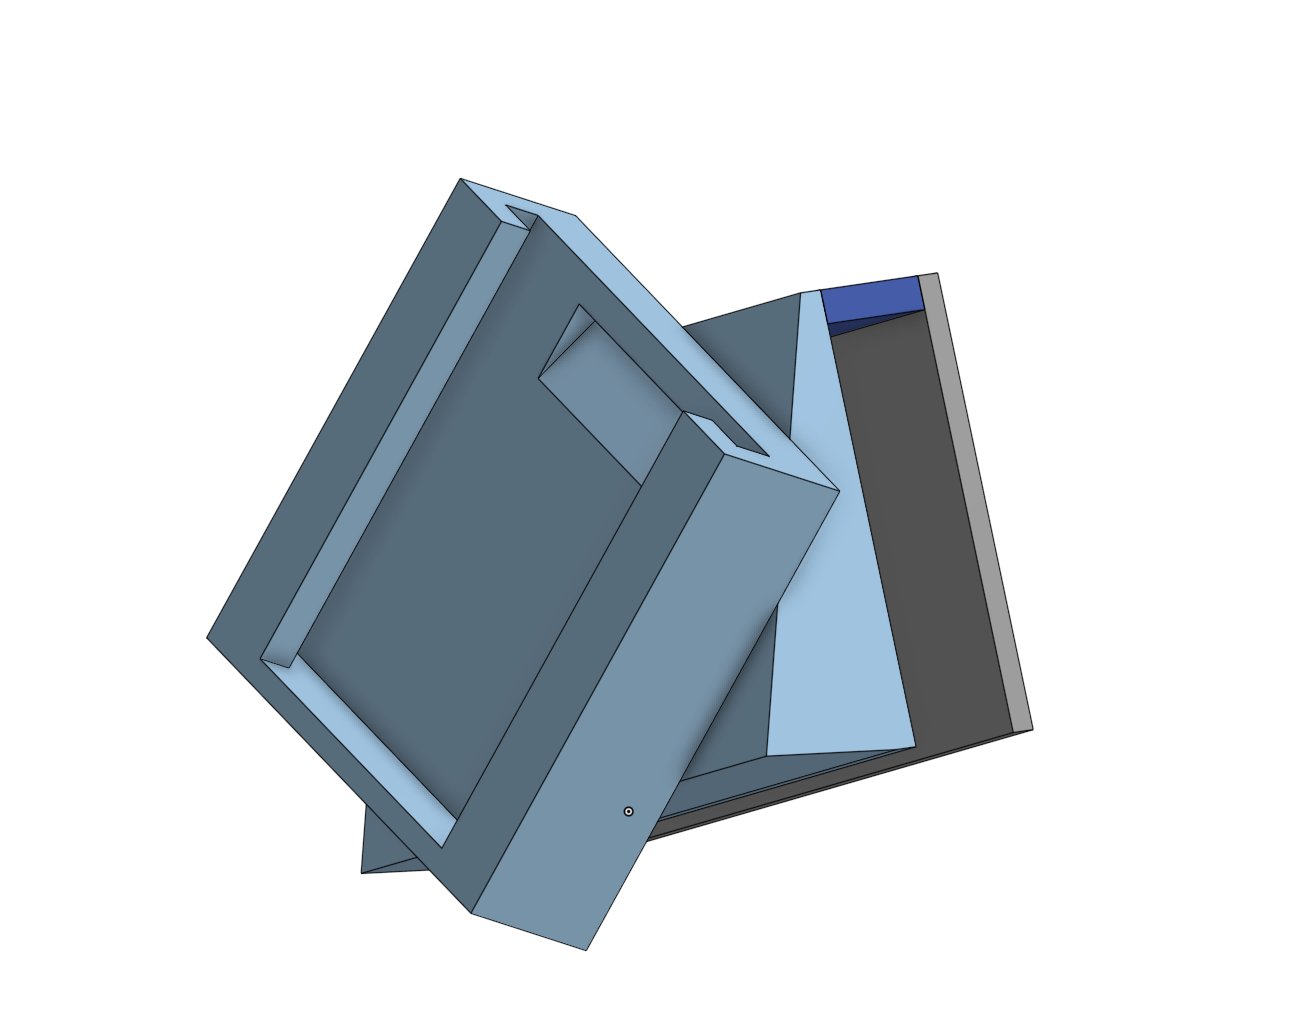
CAD model showing the two-piece bracket design. The split lets you set the angle before final assembly.
The design doesn’t use any hardware – the clamp relies on a snug fit around the tube with a locking tab, and the two halves are bonded with CA glue once the angle is confirmed. Simple, light, and it hasn’t budged.
Material Choice: PETG
I printed both pieces in PETG. For something living on a golf cart, PETG was the obvious call over PLA – it handles heat and UV exposure without warping, and it’s tough enough to take a bump without cracking. Two full seasons on the cart and the bracket looks nearly the same as the day I glued it together. Some surface scuffs, but structurally solid.
I printed in a high-vis green, partly for fun and partly so it’s easy to spot on the cart at a glance so I don’t forget to remove it at the end of a round.
Assembly
With both pieces printed, the process is pretty straightforward:
- Slide the lower clamp piece around the cart’s frame tube and confirm it seats securely.
- Attach the upper bracket piece and rotate it to your preferred angle – you want the cleaner accessible without catching on the wheel.
- Once the angle looks right, apply CA glue at the joint and hold until set.
- Drop the Scrubi cleaner into the bracket. It’s held by friction and the molded lip on the bracket.
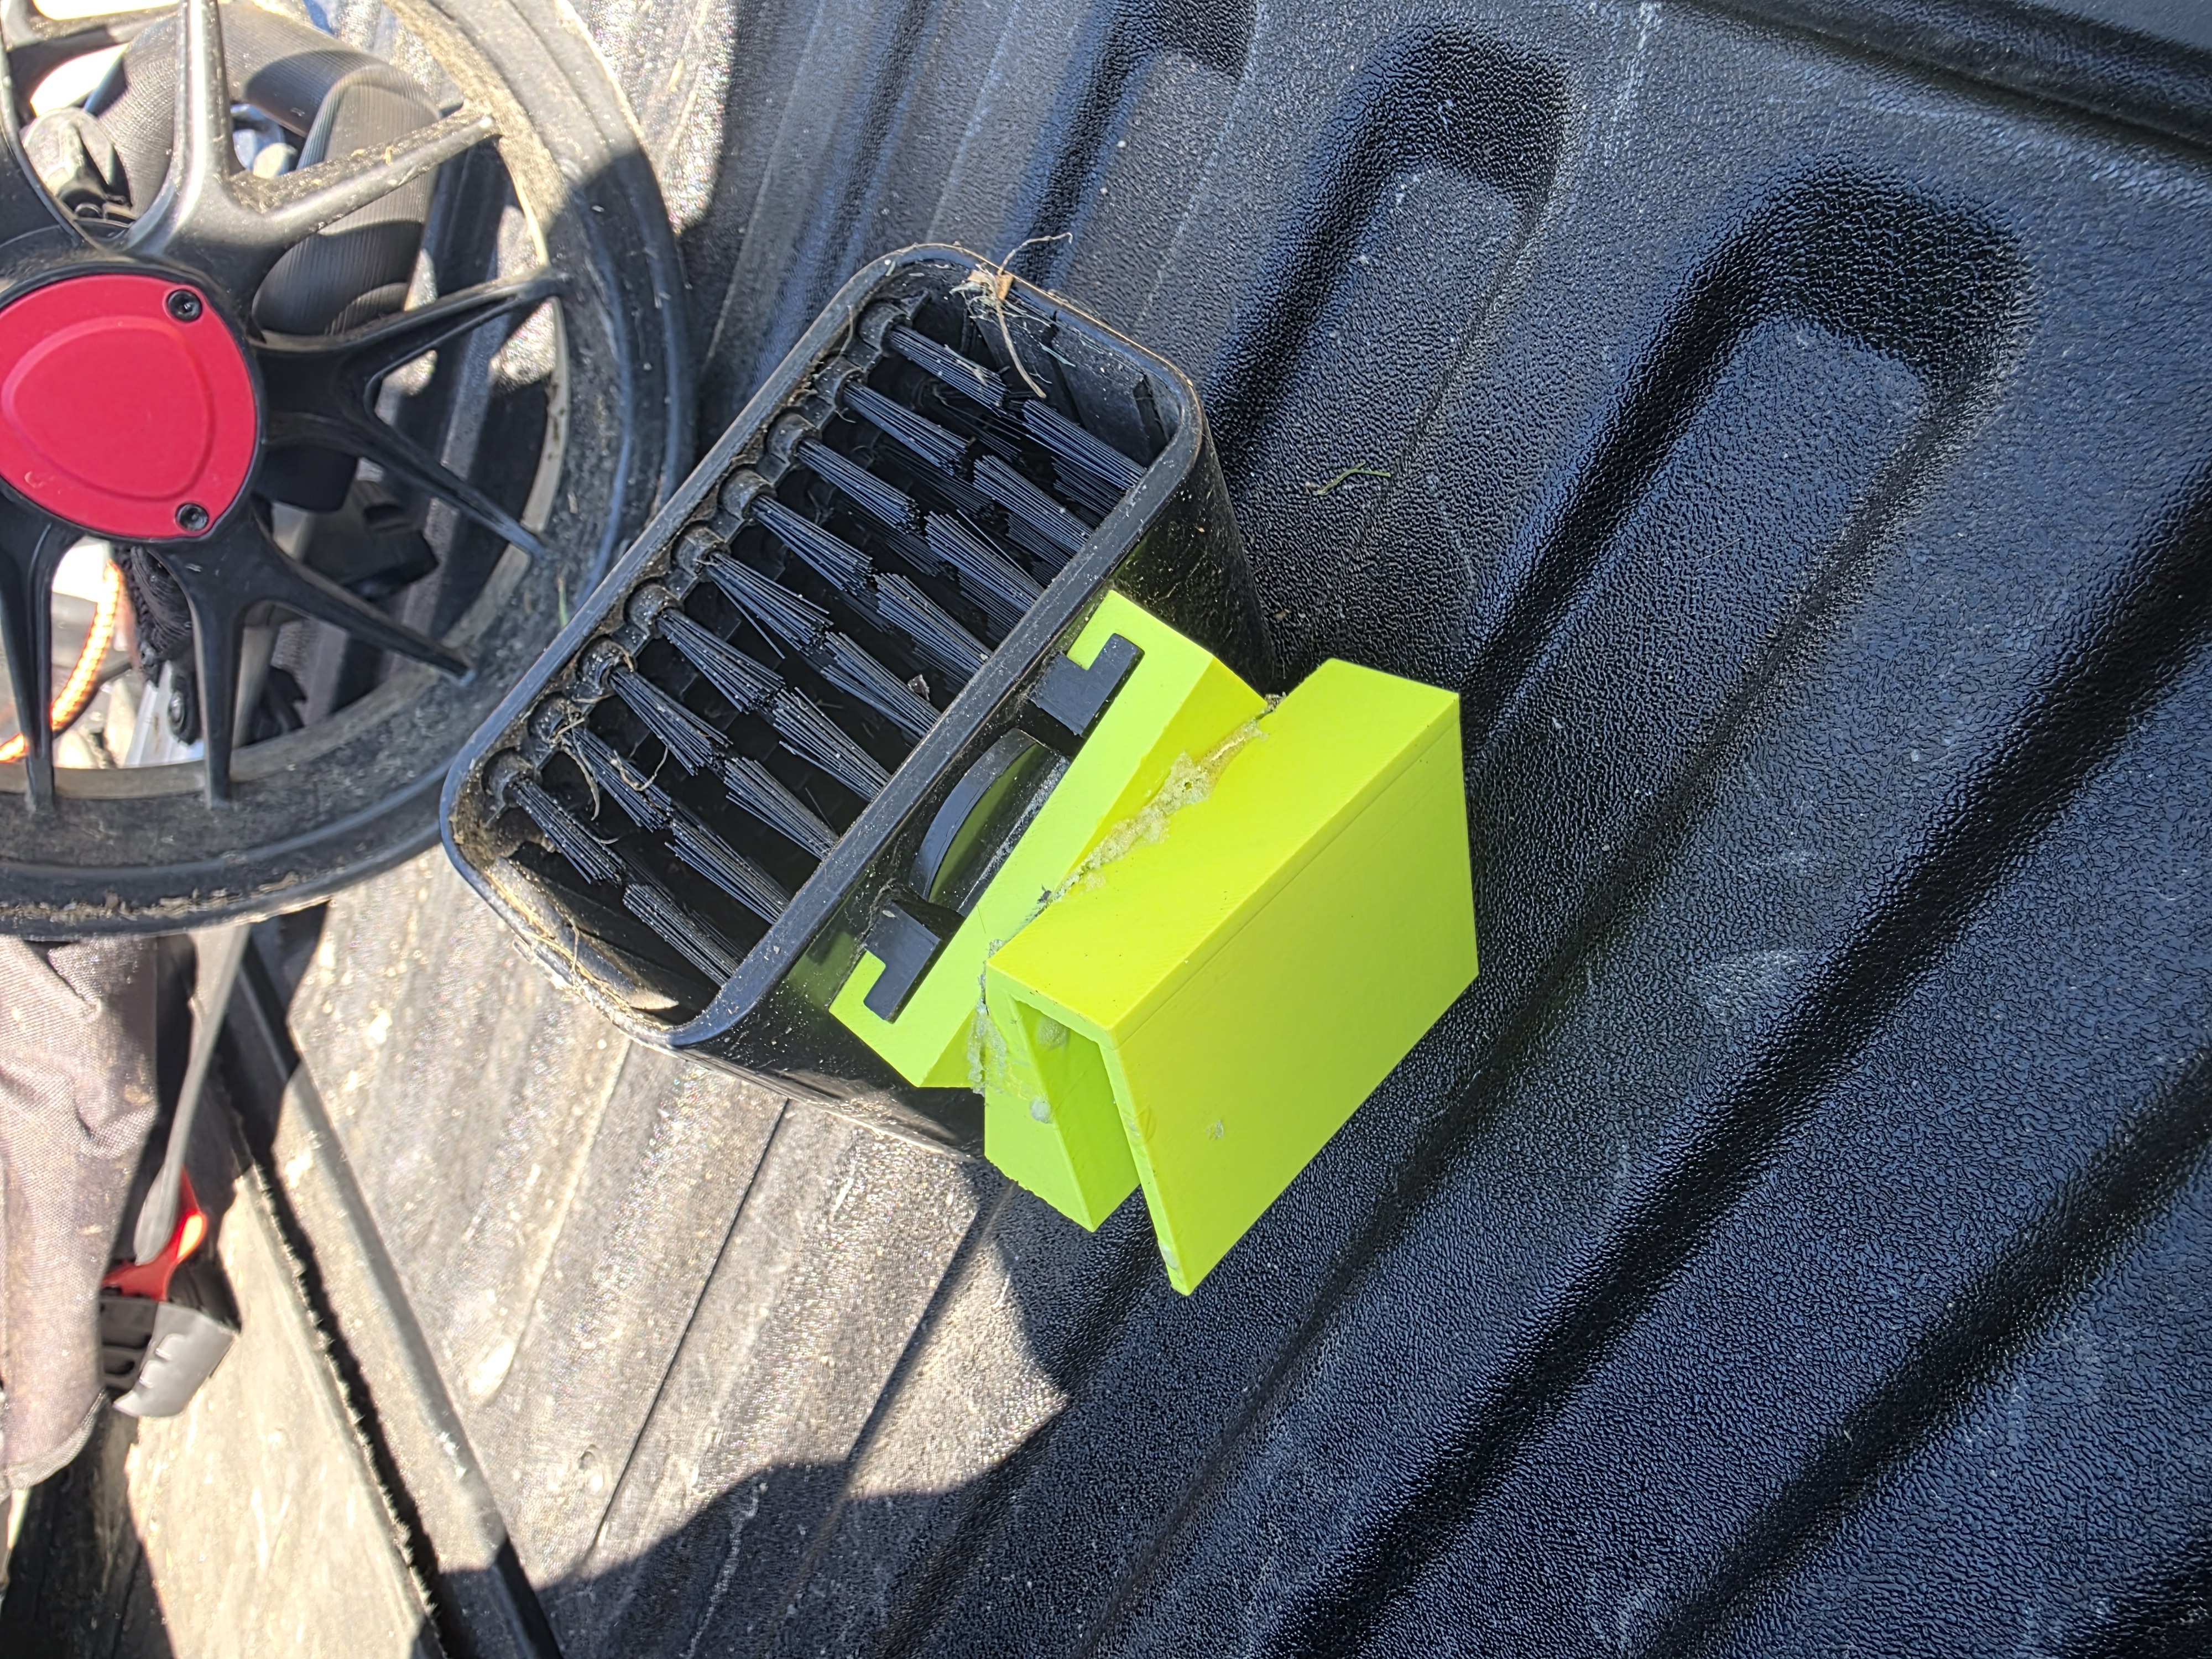
The two printed pieces alongside the Scrubi cleaner before assembly. The bracket clamps around the frame tube.
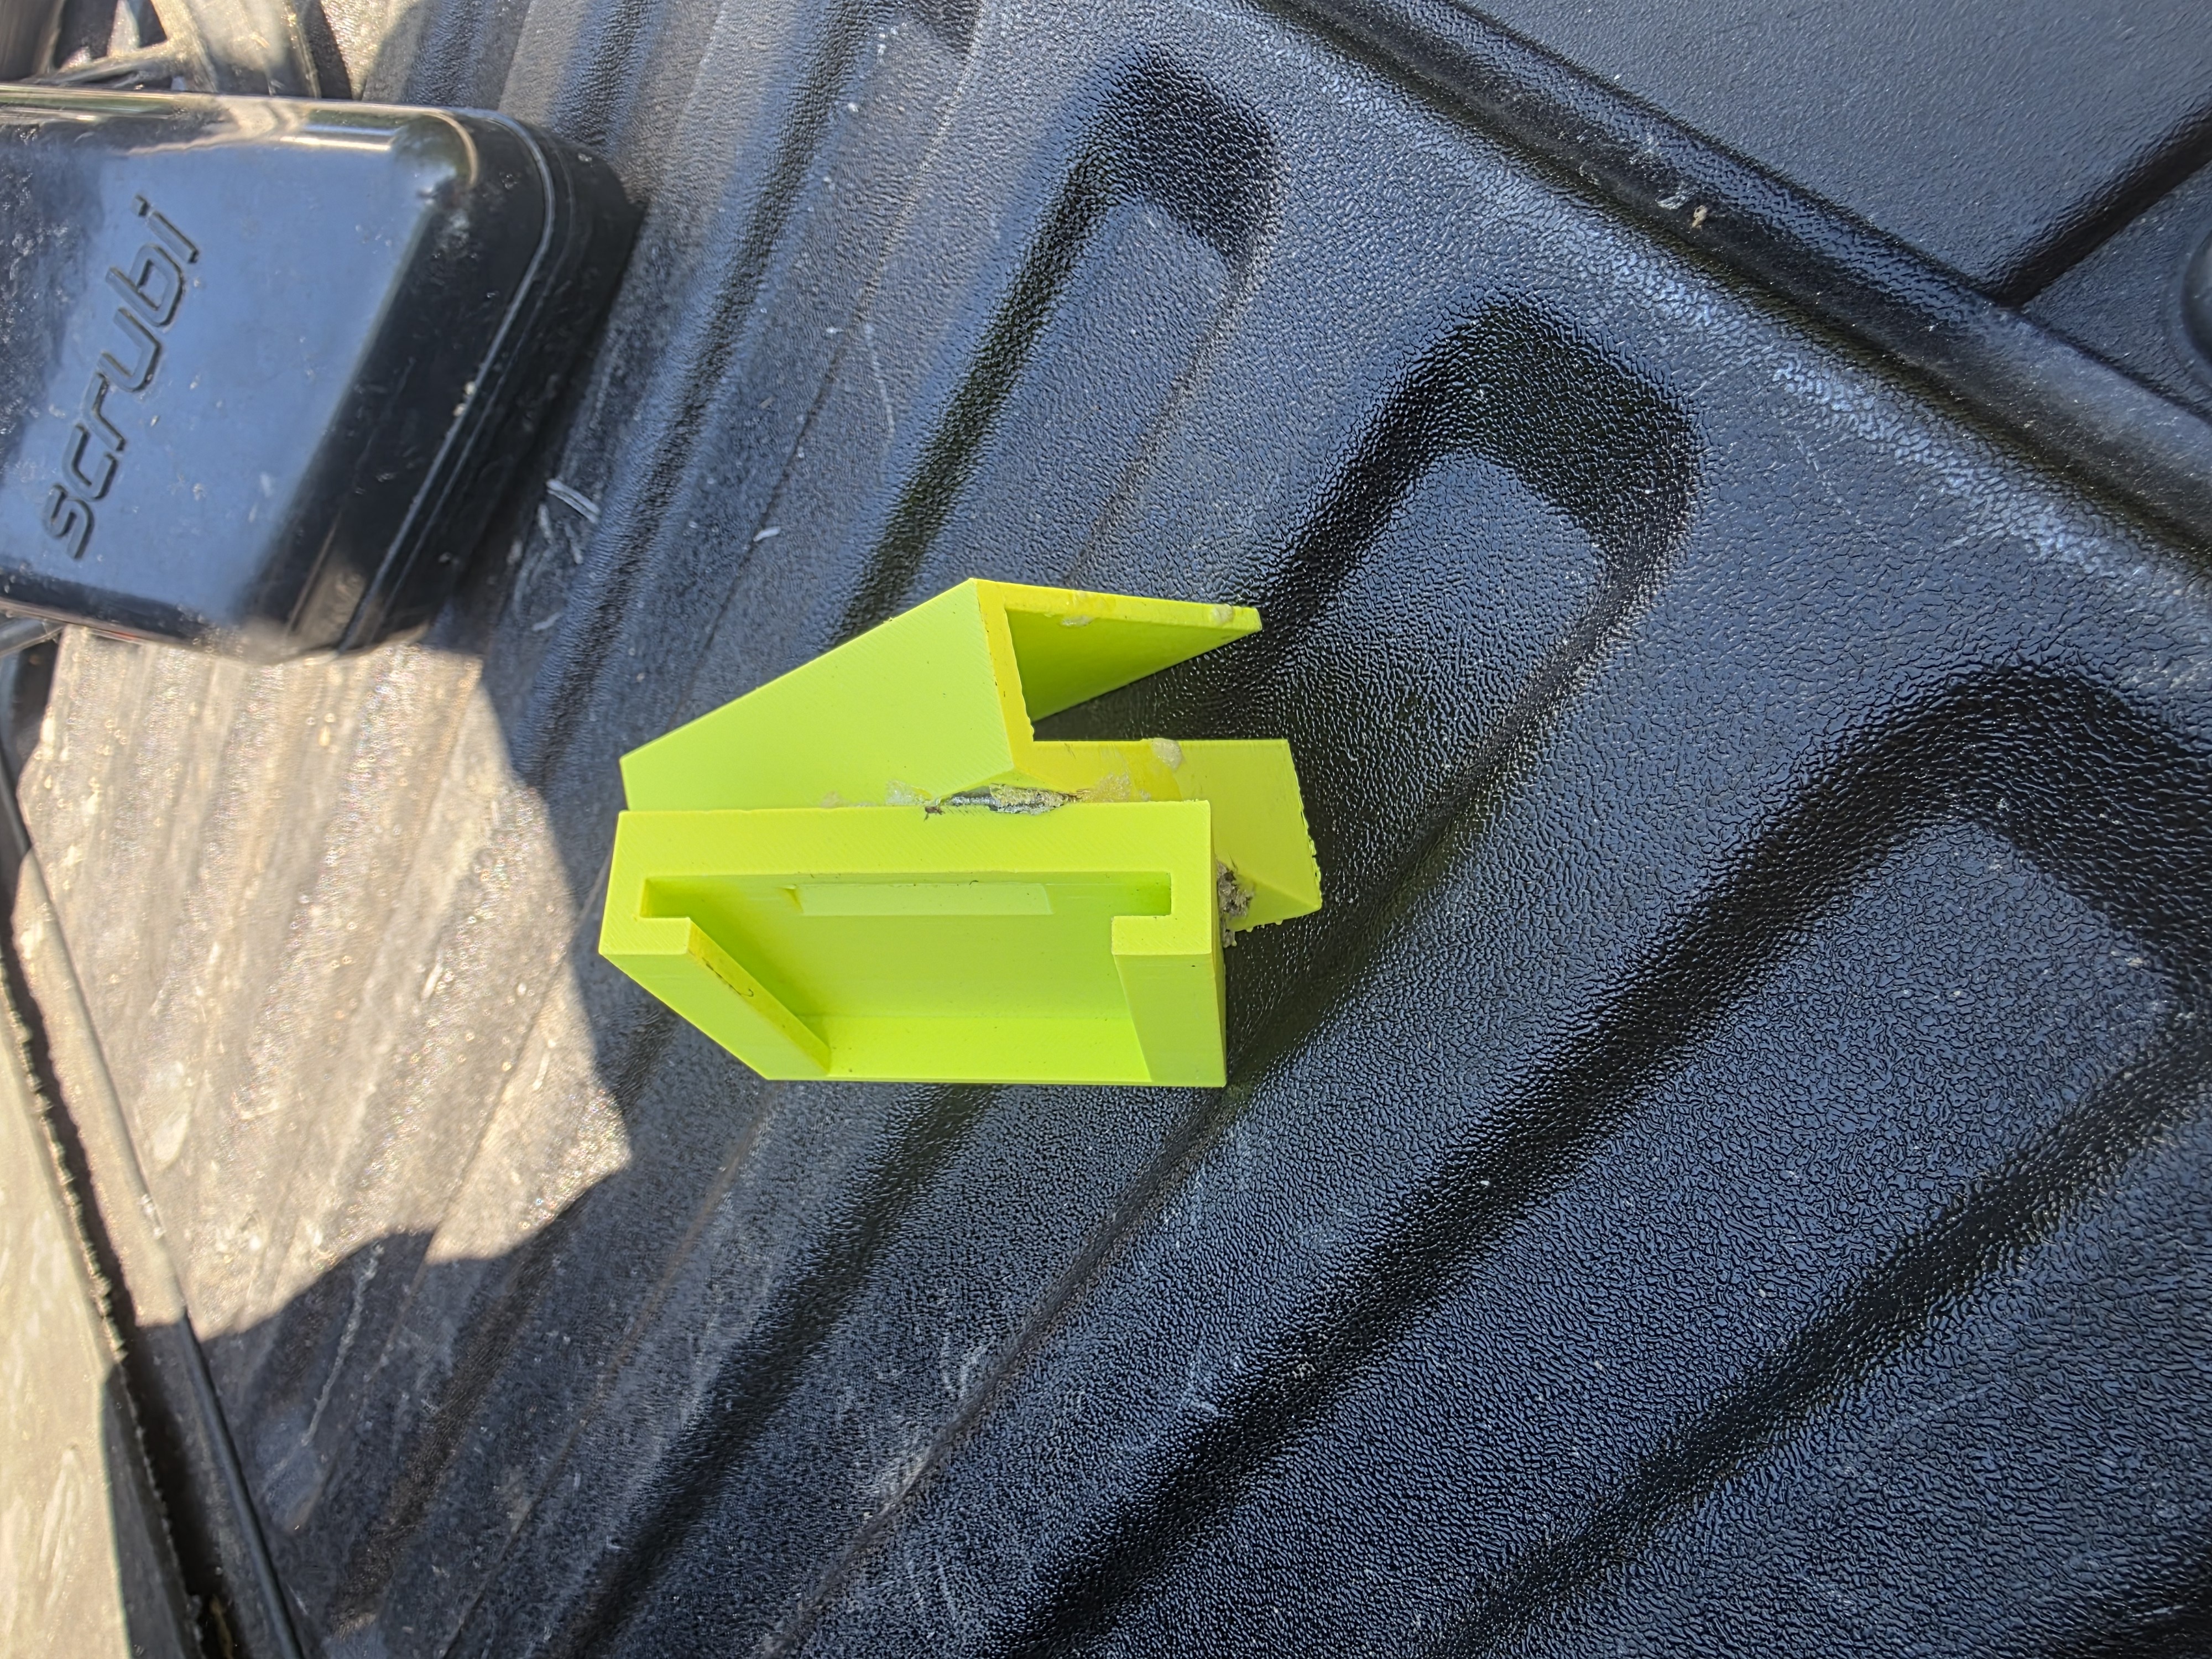
The upper bracket piece on its own. The slot and locking geometry are visible here.
Installed on the Cart
The finished assembly mounts low on the cart’s front leg, out of the way of the bag and handles but easy to reach when walking between shots.
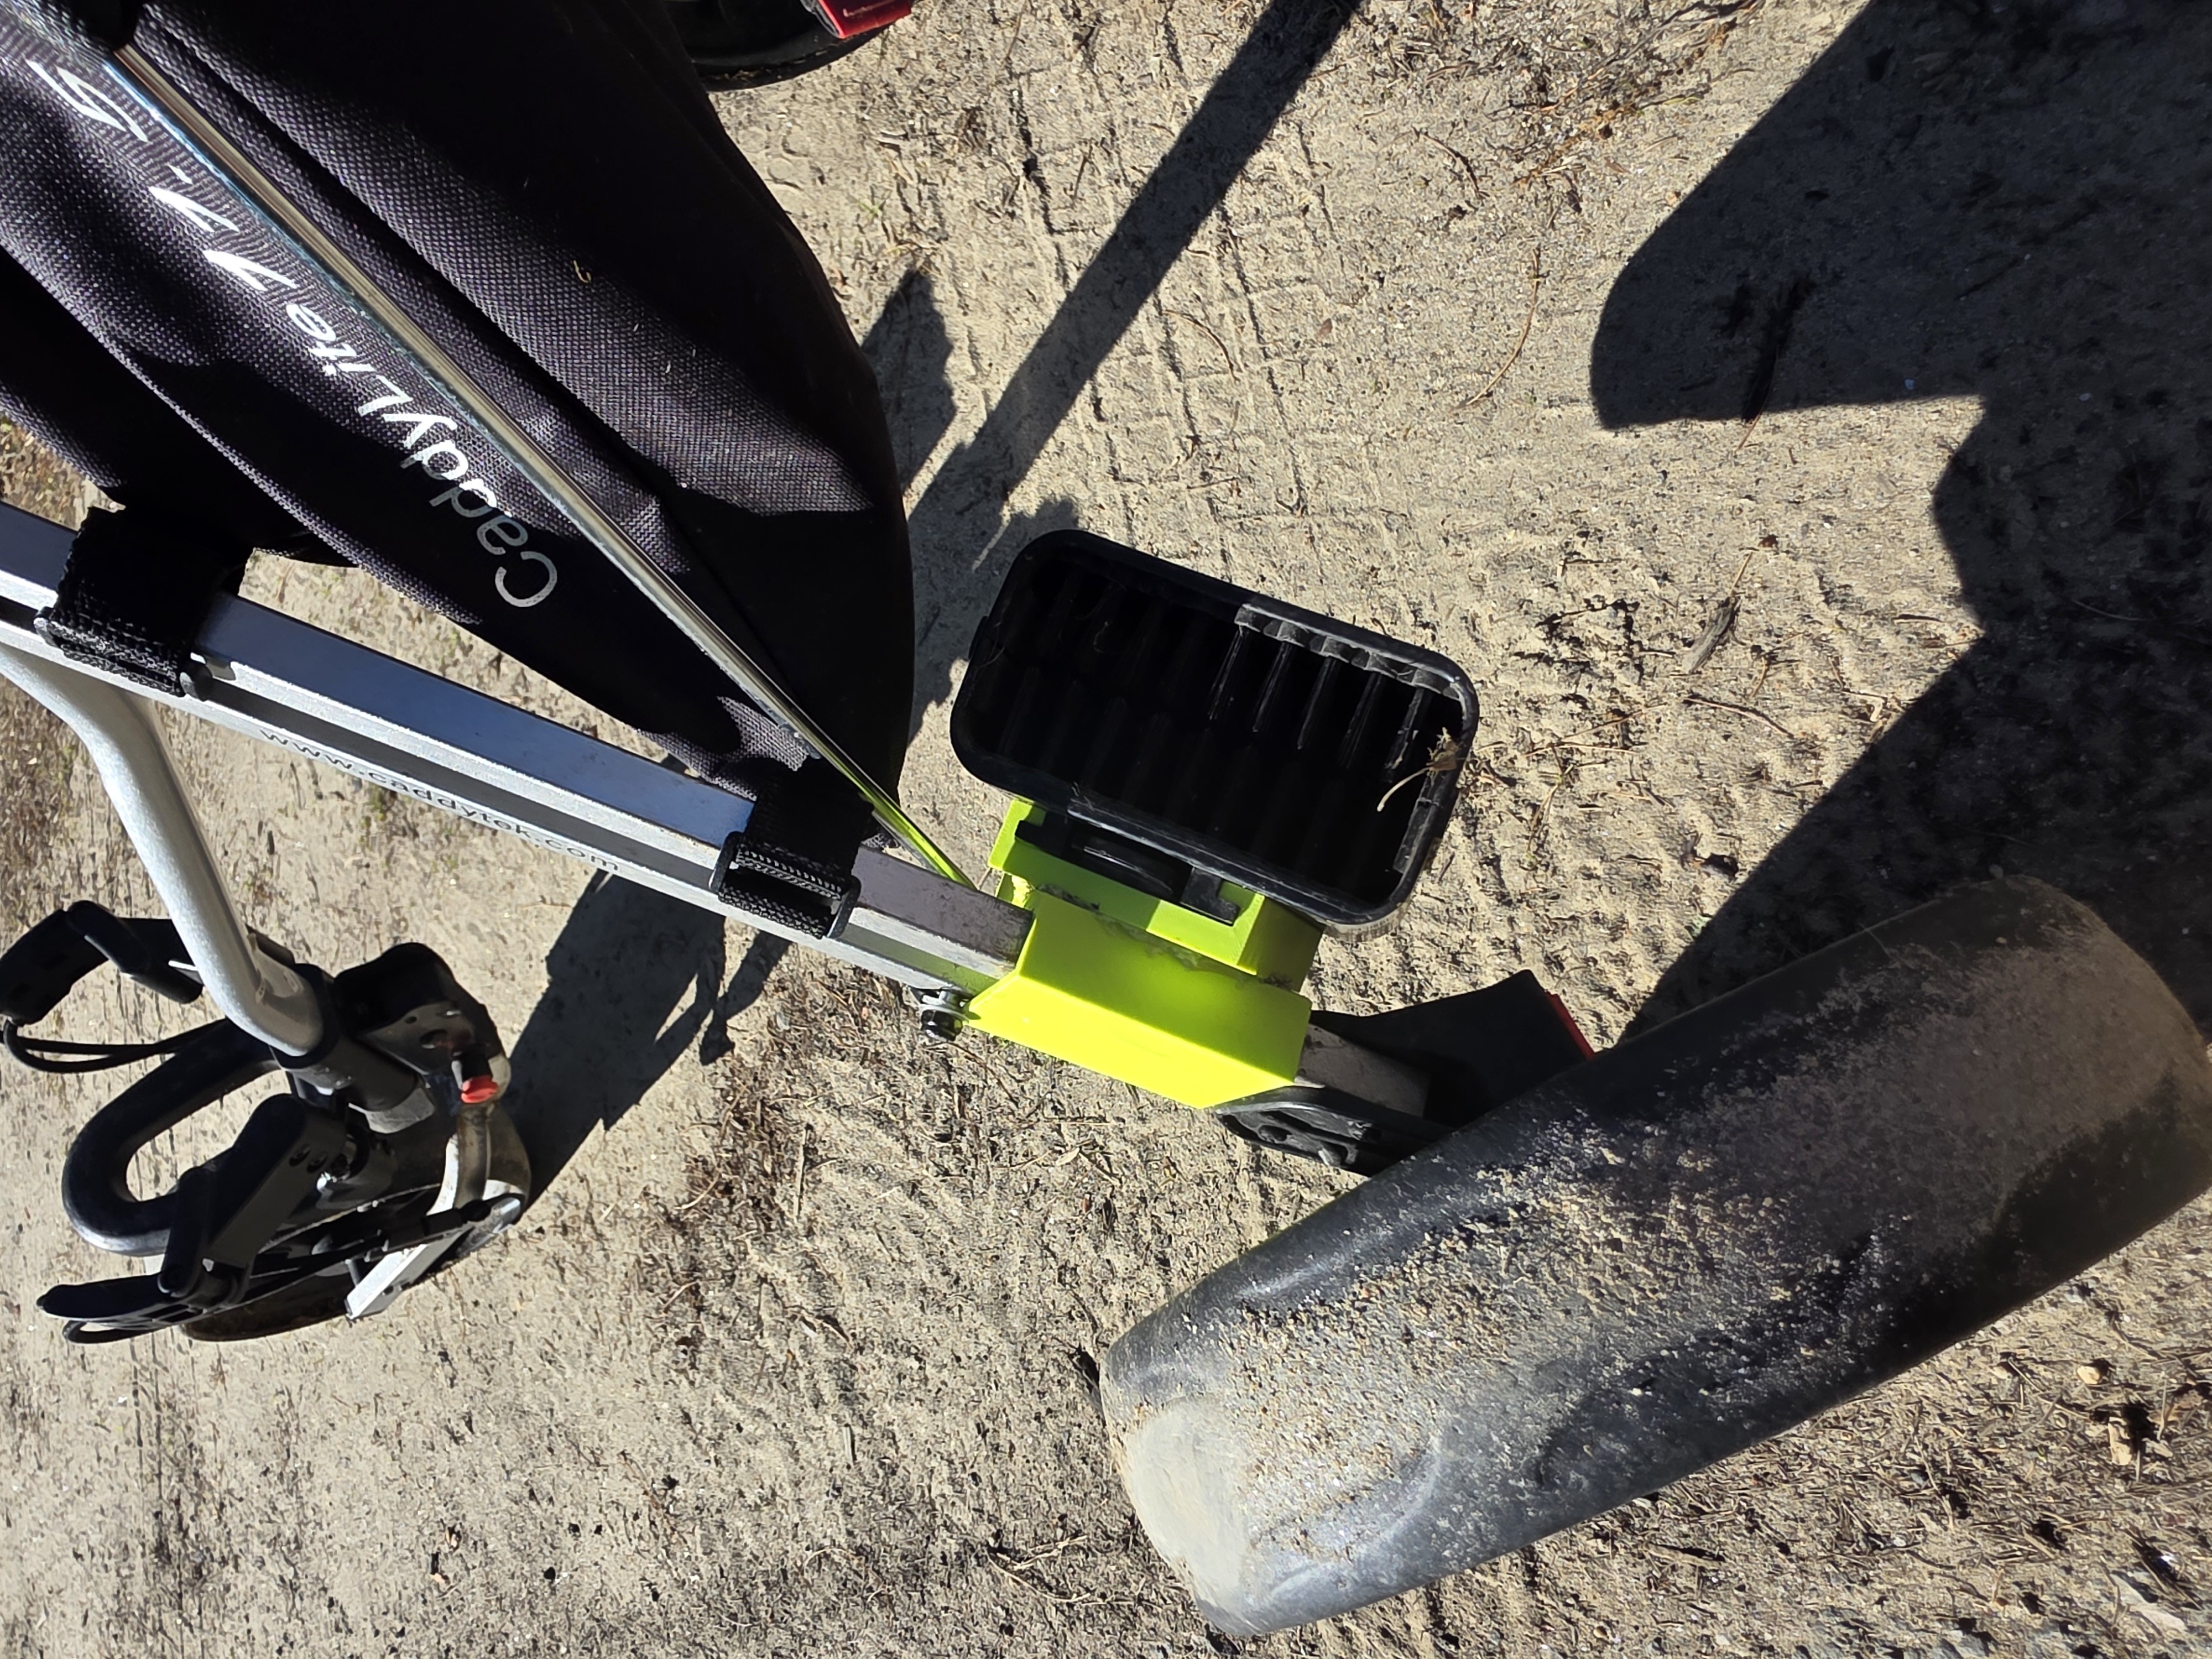
Installed on the CaddyLite 7.1.5 – front view showing the cleaner position relative to the wheel.
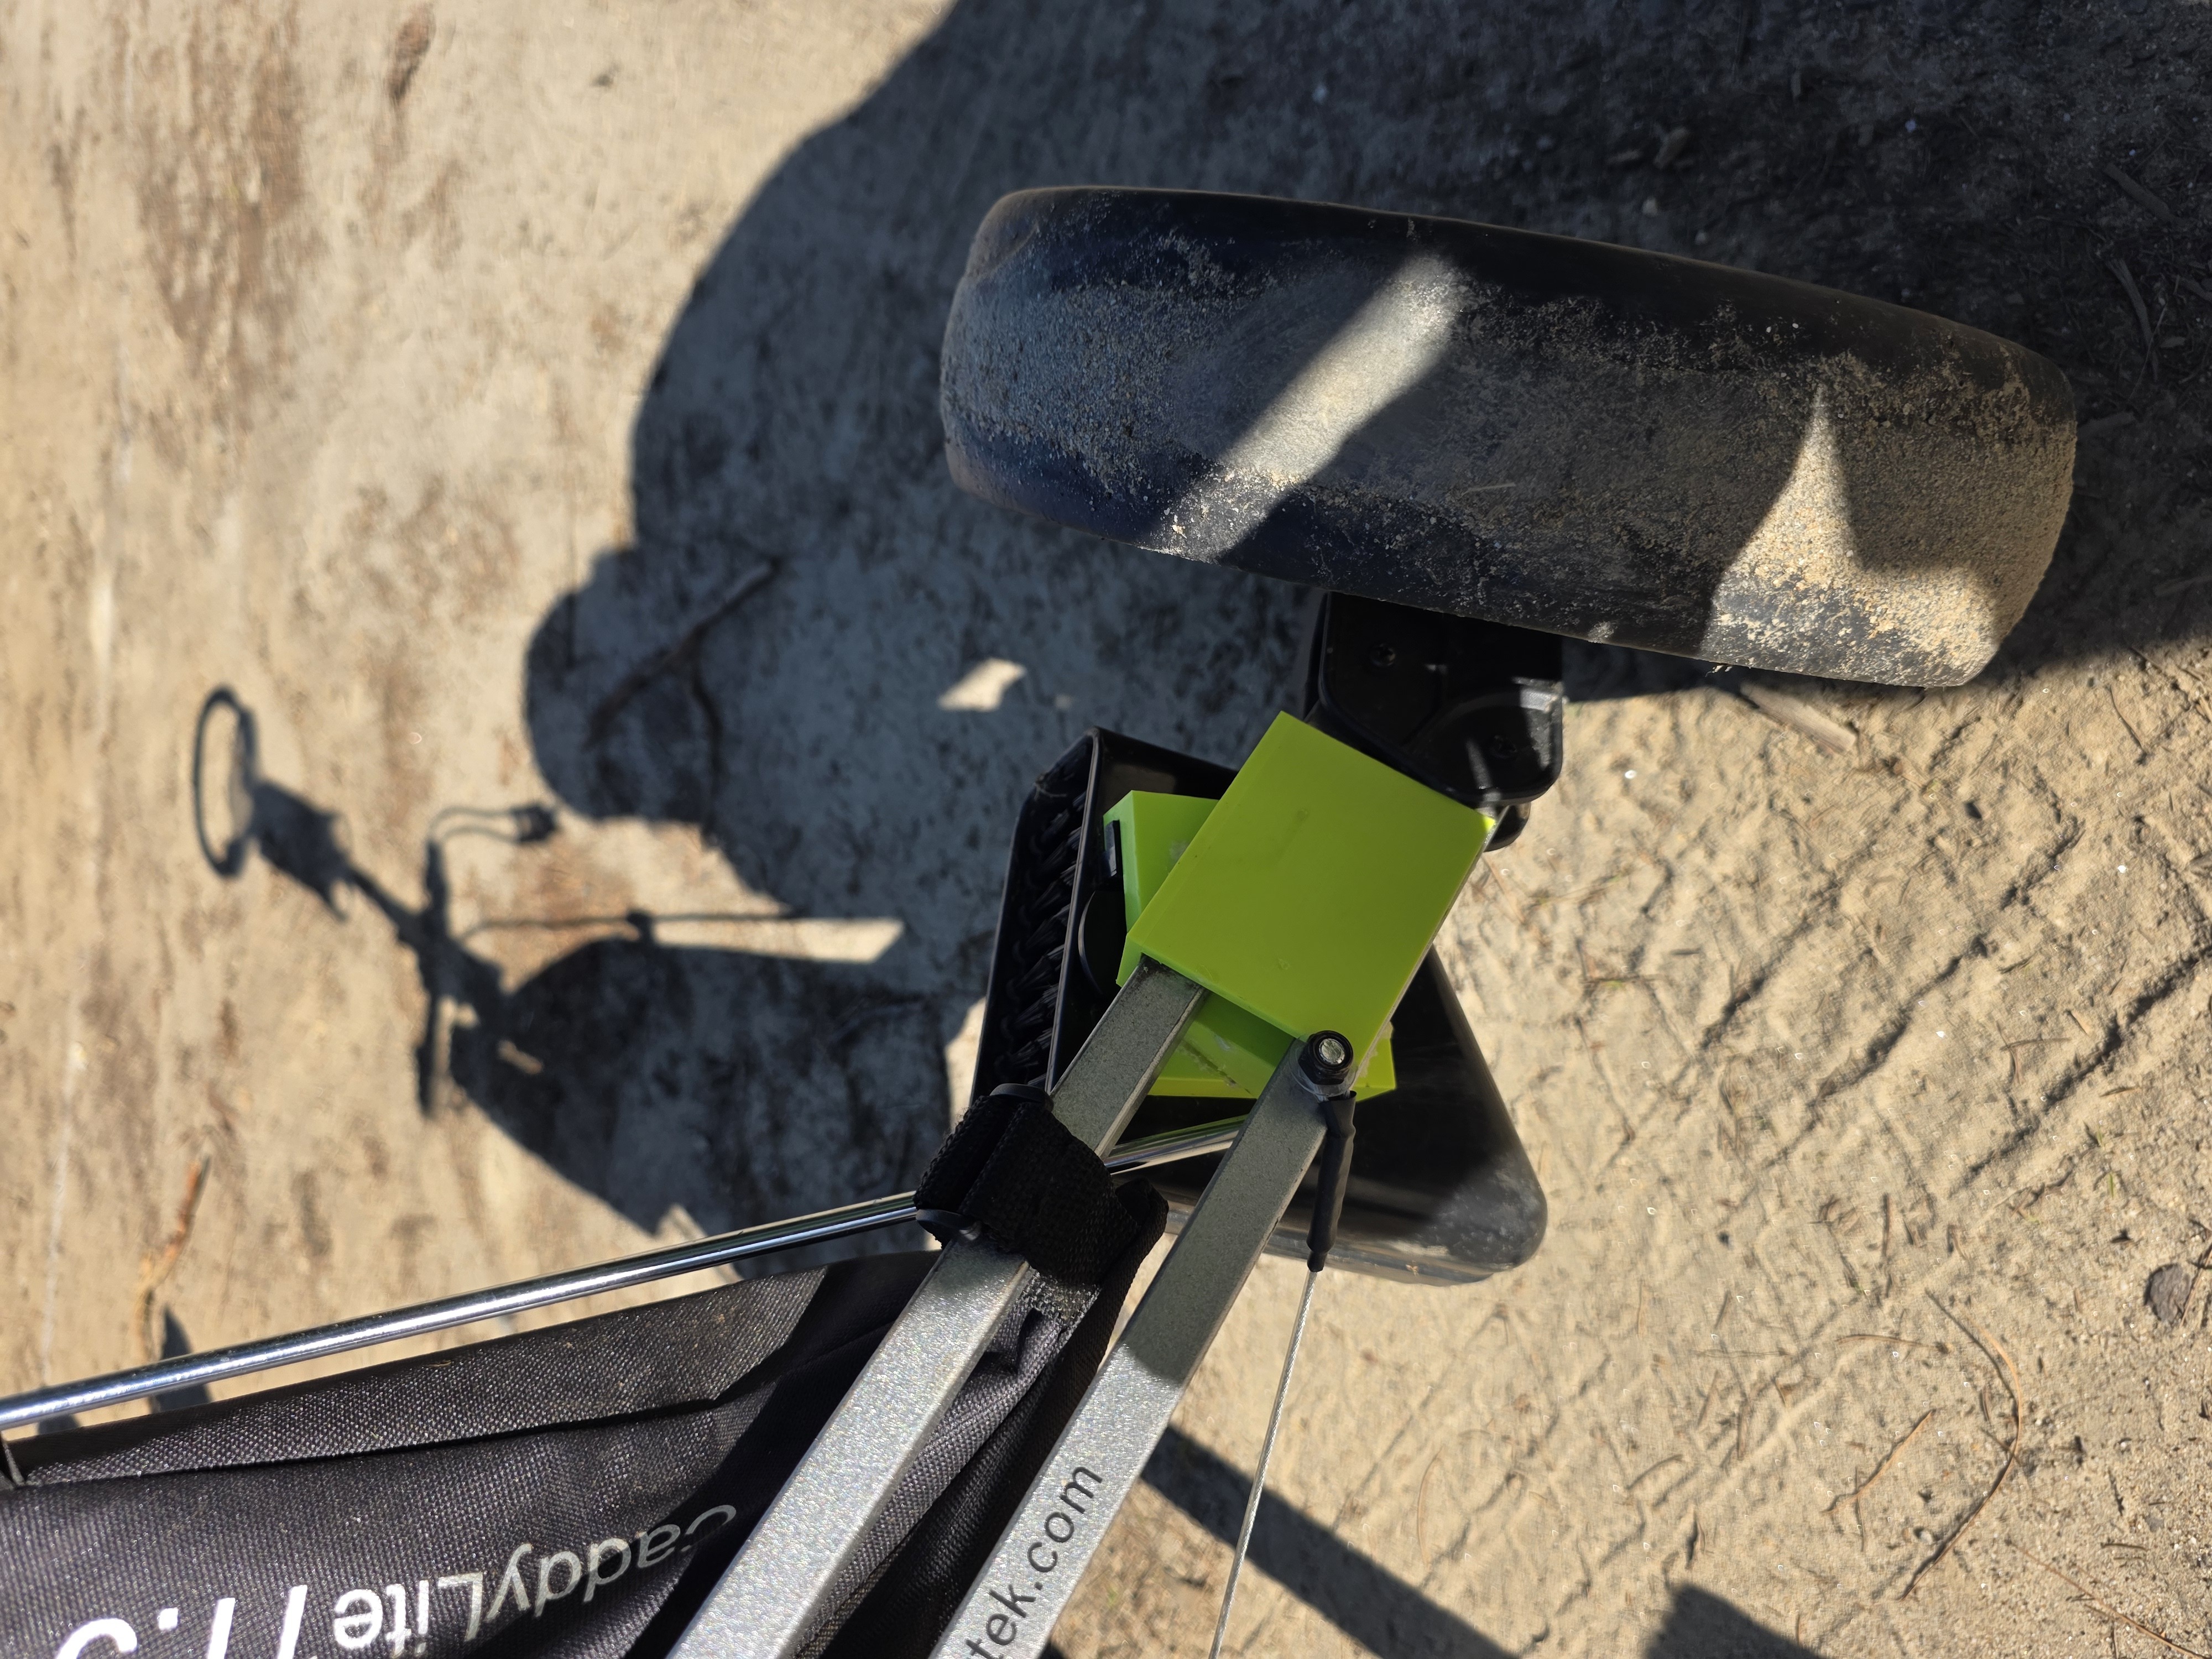
Side view of the mount. The bracket keeps everything snug against the frame.
In Use

The Scrubi cleaner mounted and ready to go. A quick dip and scrub between shots keeps the grooves clean.
The cleaner holds water well and the brush does a solid job on grass and light mud. Flipping a club upside down and running it through the bristles takes maybe two seconds – easy enough to do while walking to the next shot. The Scrubi design does what it’s supposed to do; the bracket just gets it onto a cart it wasn’t originally designed for.
Model Files
Results
Two seasons in, nothing has failed. The PETG bracket hasn’t cracked, warped, or pulled away from the glue joint. The Scrubi cleaner is still seated firmly. The only maintenance I’ve done is topping up the water before rounds.
If you play a push cart and want an integrated cleaner without switching carts, this approach works well. The design could be adapted to other tube-frame push carts with minor dimension changes. Total print time for both pieces was a few hours, and the build cost was essentially just the Scrubi cleaner itself since I already had PETG on hand.